
 Today’s Tip: Using spreadsheets to update/edit your Shopify store!
I know it can look overwhelming… but once you get the hang of it, it can save you SO much time.
The first thing I’d recommend is exporting a couple of the products you’ve already got set up in your store so you can take a look at the pattern of the spreadsheet. It’ll be a lot more clear when its your own content.
When you look at the spreadsheet in the first row (I used Google Docs to edit mine), you’ll see the Handle, which is the url of your product, then Title, Body, Vendor, etc. Everything is based off the handle url keeping the information and variants connected to that product, so for anything that has to do with your product, it has to have the correct url in column A so Shopify knows which product you’re editing.
The variants are called “Option”s in the spreadsheet, but again, using your own product will make this part so much clearer. You’ll see the name of your variant, and then each of the items that show in the drop down. In my example, I have 3 variants, Size, Colour, and Message, so I need to have each of those variant combinations in the spreadsheet. Let’s say you want a black, tshirt that says “Support your local maker” in medium. That has to exist as a line in the spreadsheet for the combination to be possible for purchase. I’m showing my own shop as an example because it’s likely one of the most complicated with all the variant options.
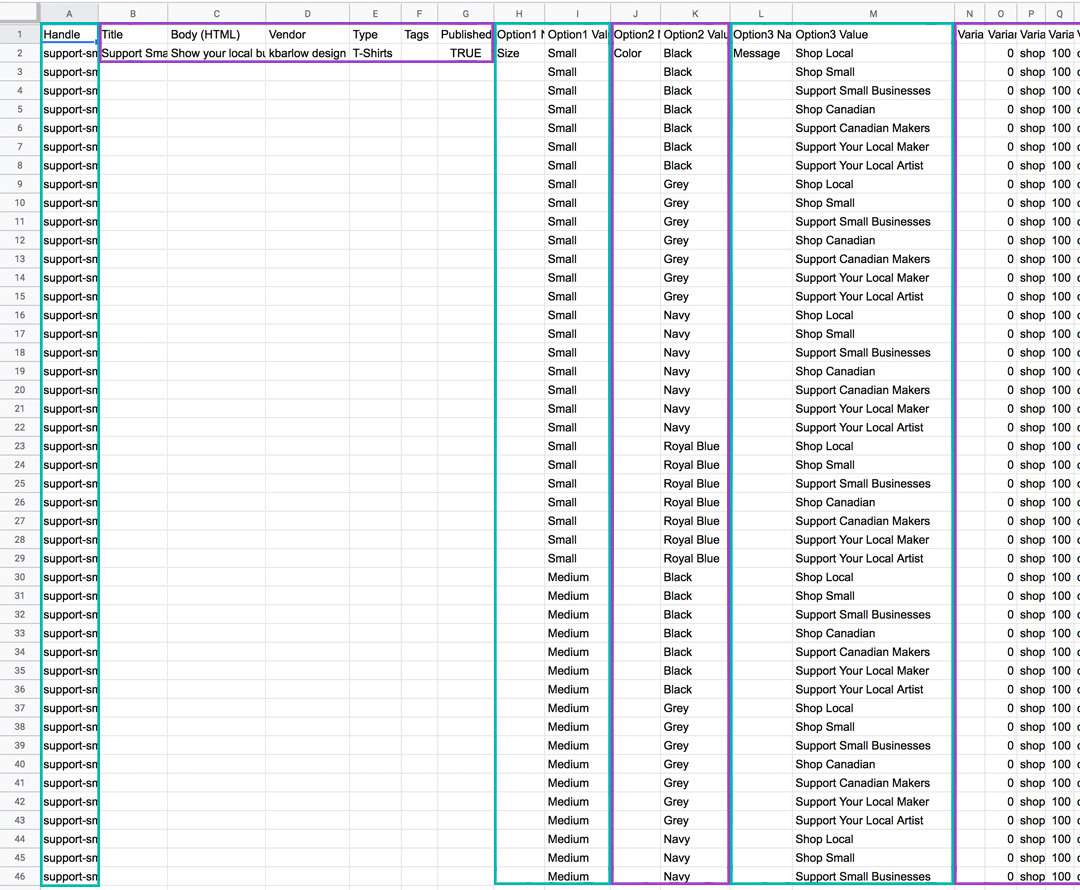
There are 96 variants in the ONE tee shown here… can you imagine how long that would take to set up manually? Once I got the hang of it, I mostly copied/pasted and duplicated these CSV files and it was so much faster.
Past the variants, you’ve got the Inventory, Price, and a few other values that you’ll see are mostly just the same value for each row.
Now… images. This is the tricky part, because it’s the one area of the spreadsheet that doesn’t correspond to any of the rest of the information in those rows. I’ll do a follow up on how all this works (it needs its own tutorial).
Once you’re done your edits, you go to Products, and then import your CSV file. You can change up the images within Shopify, and edit anything you want from the changes you made in your spreadsheet in Shopify too, but I found it was easier to just edit the spreadsheet and re-upload the newest version.
What do you think? Will you give it a try? There is a small learning curve… but it’s worth it in the long run, I promise!